Connecting to Microsoft 365
This section describes how to connect to Microsoft 365 (M365). This includes various stages such as granting consent (permissions), publishing the Meeting Insights Teams client app in the Teams Store, and downloading and running the script that allows the app to be added to ongoing meetings.
|
●
|
Microsoft 365 Global Administrator permissions are required to grant consent. |
|
➢
|
To connect to Microsoft 365: |
|
1.
|
After signing in to Meeting Insights, the 'Connect to your M365' page is displayed (Admin Settings > System Settings > Connect to your M365). The 'Completed' column displays the  icon for all consents, indicating that none of the consent types have been granted. icon for all consents, indicating that none of the consent types have been granted. |

|
2.
|
(Mandatory) 'M365 Login' Consent: |
This consent grants the Meeting Insights app permission to authenticate users with your Microsoft 365 credentials. When the consent is approved, the app reroutes users to Microsoft 365 for authentication (Azure Active Directory authentication - Microsoft OpenID Connect).
|
●
|
You must first grant this consent before continuing with the other consents. |
|
●
|
Microsoft 365 Global Administrator permissions are required to grant consent. |
|
a.
|
Next to ‘M365 Login’, click Grant Admin Consent; you're prompted to log in to your Microsoft 365 account. |
|
b.
|
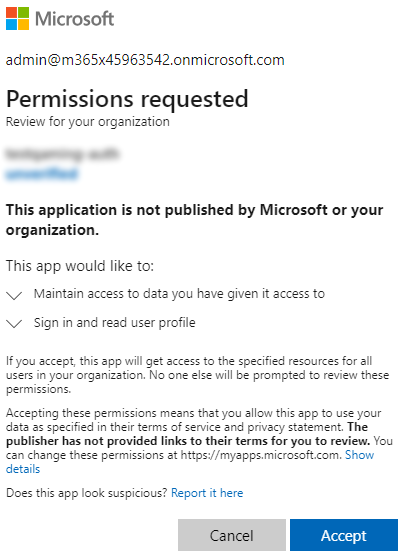
Log in to your Microsoft 365 Global administrator account; the following permissions dialog box appears: |
|
c.
|
Click Accept; the 'Completed' column displays the  icon, indicating that you've successfully granted 'M365 Login' consent. icon, indicating that you've successfully granted 'M365 Login' consent. |
Even if you later revoke consent, the icon remains green.
|
3.
|
(Mandatory) ‘Read Azure Active Directory Groups and Users’ Consent: |
This consent grants the Meeting Insights app permission to read Azure Active Directory (AD) groups and users, and permission for groups' users to access the app and record.
|
●
|
You can only grant this consent after you've successfully granted ‘M365 Login’ consent, as described in see Step 2 (above). |
|
●
|
Microsoft 365 Global Administrator permissions are required to grant consent. |

|
a.
|
Next to ‘Read Azure Active Directory Groups and Users’, click Grant Admin Consent; you're prompted to log in to your Microsoft 365 account. |
|
b.
|
Log in to your Microsoft 365 Global Administrator account; the following permissions dialog box appears: |

|
c.
|
Click Accept; the 'Completed' column displays the icon, indicating that you've successfully granted ‘Read Azure Active Directory Groups and Users’ consent. |
|
4.
|
(Mandatory) ‘Allow Meeting Insights to Join Meetings’ Consent: |
This consent grants the Meeting Insights app permission to join your Tenant's Teams meetings to record calls' info and media.
|
●
|
You can only grant this consent after you've successfully granted the ‘M365 Login’ and ‘Read Azure Active Directory Groups and Users’ consents, as described in the previous steps. |
|
●
|
Microsoft 365 Global Administrator permissions are required to grant consent. |

|
a.
|
Next to the consent ‘Allow Meeting Insights to Join Meetings’, click Grant Admin Consent; you're prompted to log in to your Microsoft 365 account. |
|
b.
|
Log in to your Microsoft 365 Global Administrator account; the following permissions dialog box appears: |

|
c.
|
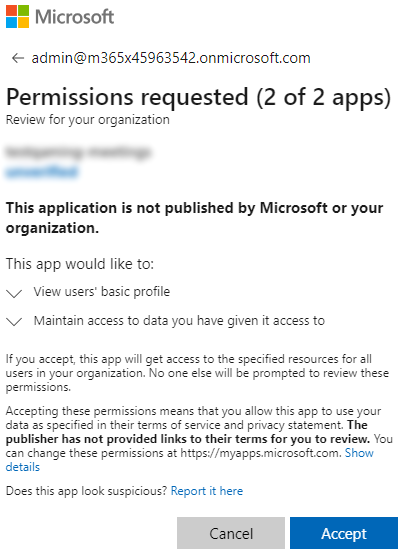
Click Next; a second permissions dialog box appears: |
|
d.
|
Click Accept; the 'Completed' column displays the icon, indicating that you've successfully granted ‘Allow Meeting Insights to Join Meetings’ consent. |
|
5.
|
(Optional) 'Mobile App M365 Login' Consent: |
This consent grants the Meeting Insights mobile app permission to with their Microsoft 365 credentials. authenticate users. When the consent is approved, the app reroutes users to Microsoft 365 for authentication (Azure Active Directory authentication - Microsoft OpenID Connect).
|
●
|
You can only grant this consent after you've successfully granted the ‘M365 Login’, ‘Read Azure Active Directory Groups and Users’, and ‘Allow Meeting Insights to Join Meetings’ consents, as described in the previous steps. |
|
●
|
Microsoft 365 Global Administrator permissions are required to grant this consent. |

|
a.
|
Next to 'Mobile App M365 Login', click Grant Admin Consent; you're prompted to log in to your Microsoft 365 account. |
|
b.
|
Log in to your Microsoft 365 Global Administrator account; the following permissions dialog box appears: |

|
c.
|
Click Accept; the 'Completed' column displays the icon, indicating that you've successfully granted 'Mobile App M365 Login' consent. |
|
6.
|
'Publish Meeting Insights Teams Client App in your Teams Store' consent:
|
This consent adds the Meeting Insights app to the Teams store and users' Teams clients for access and adding it to ongoing meetings.
|
●
|
Microsoft 365 Global Administrator permissions are required to grant this consent. |
|
●
|
In the Teams store, you can set policies for installing and automatically pinning the app for specific groups or users. |
|
●
|
Alternatively, you can publish the app using the 'Tools' page, as described here. |

|
a.
|
Next to 'Publish Meeting Insights Teams Client App in your Teams Store', click Publish ; you're prompted to log in to your Microsoft 365 account. |
|
b.
|
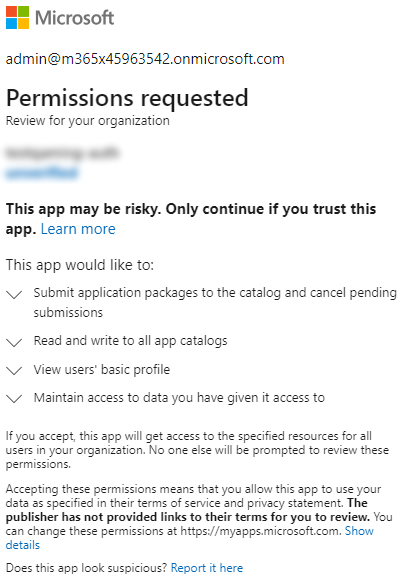
Log in to your Microsoft 365 Global Administrator account; the following permissions dialog box appears: |
|
c.
|
Click Accept; the 'Completed' column displays the icon, indicating that you've successfully granted 'Publish Meeting Insights Teams Client App in your Teams Store' consent. In addition, the notification "Application published in your Teams store successfully" message is displayed. |
|
d.
|
[Recommended] Install and pin the application for Meeting Insights users, as described here. |
|
7.
|
‘Allow Meeting Insights to be Added to Ongoing Meetings’ consent:
|
This consent grants the Meeting Insights Teams client app permission to be pulled into ongoing meetings through Online Meeting Global Application access. This stage runs a PowerShell script file to create an access policy that connects to the same consented App ID, allowing users to ad-hoc pull Mia into Teams meetings.

|
a.
|
Next to the ‘Allow Meeting Insights to be Added to Ongoing Meetings’ consent, click Download Script; the 'policyScript' file is downloaded to your PC. |
|
b.
|
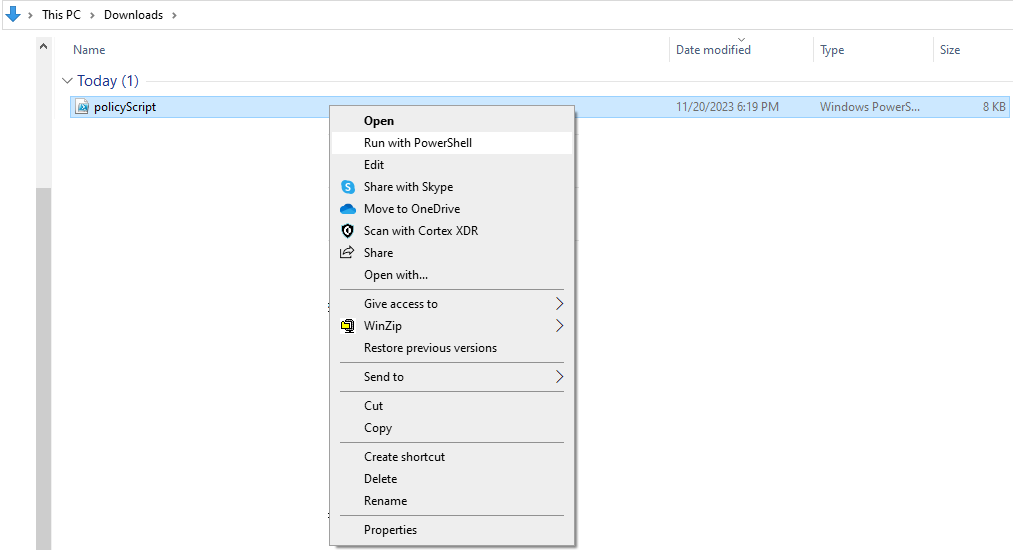
Before running
the downloaded script file, unblock it because your operating system may block it. To unblock it, right-click the file, and then choose Properties. If you're using Windows 11, first click Show more options to see the Properties option in the context menu. Select the General tab and then check the Unblock option located under the 'Security' section. |
|
●
|
PowerShell must be installed on your PC and the PC must have an unrestricted execution policy for the Microsoft 365 global admin to run the downloaded script. |
|
●
|
Run the script from the PC using PowerShell with 'Bypass' execution policy. The execution policy must be as follows:
Set-ExecutionPolicy -ExecutionPolicy Bypass -Scope LocalMachine |
|
●
|
The script file runs the following PowerShell cmdlets: |
|
✔
|
Start-Process: Starts the process on the local computer. |
|
✔
|
Invoke-RestMethod: Validates the token with Meeting Insights by making a simple HTTP/S request. |
|
✔
|
Install-Module MicrosoftTeams: Installs Microsoft Teams module. |
|
✔
|
Import-Module MicrosoftTeams: Imports Microsoft Teams module. |
|
✔
|
Connect-MicrosoftTeams: Connects to Microsoft Teams. |
|
✔
|
Get-CsApplicationAccessPolicy: Retrieves the application access policy configured for use in the tenant. |
|
✔
|
Set-CsApplicationAccessPolicy: Creates the application access policy. |
|
c.
|
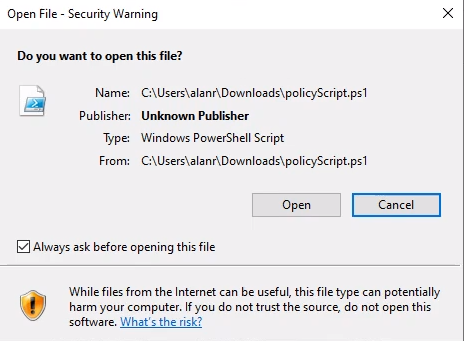
Right-click the file, and then choose Run with PowerShell: |
The following dialog box appears:
|
d.
|
Click Open; PowerShell opens: |

|
e.
|
[Note that this screen is not always displayed after changing the execution policy the first time.] Type A (Yes to All), and then press Enter: |
|
f.
|
Type Y (Yes) if the prompt below is displayed (it isn't always displayed), and then press Enter: |

|
g.
|
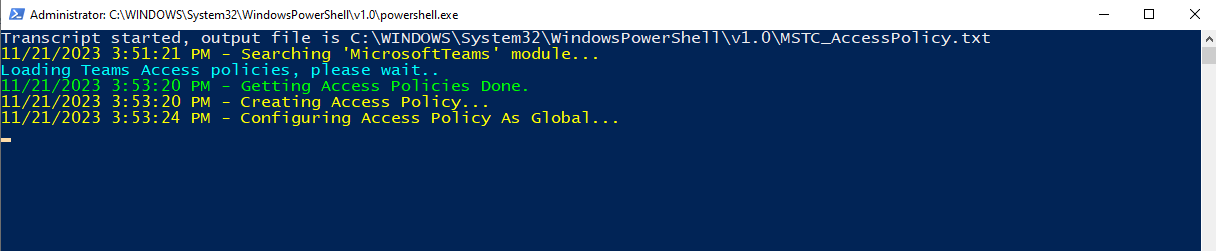
Press Enter to continue: |
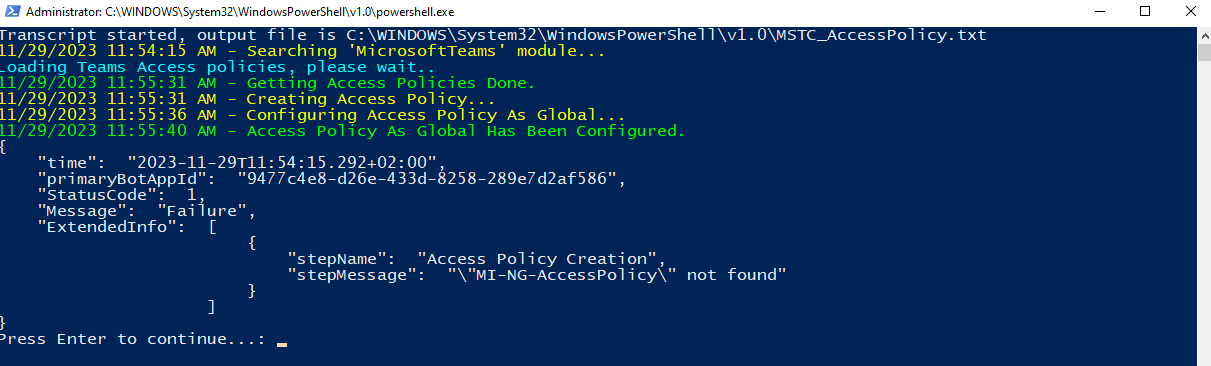
You've successfully provided the Meeting Insights Teams client app with permissions to be pulled into ongoing meetings through Online Meeting Global Application access. It may take up to 30 minutes for the permissions to take effect. The M365 admin must run the downloaded script from a PC that has PowerShell installed and unrestricted execution policy.

You've successfully connected to Microsoft 365.
Next: Assign licenses to Meeting Insights users as shown here.
The 'Auto can edit' feature takes effect on a meeting only if the user with this permission has joined the meeting. If the user hasn’t joined, they will not be able to edit it automatically.